DIY Mirror Foil Makeover for Home Furniture & Decor
.png)
Do you want to refresh your old furniture but have no idea where to start? Or maybe you’ve seen mirror-effect decor online and wondered how to get that glossy, reflective look at home — without spending much? You’re in the right place!
In this easy DIY tutorial, I’ll show you how to use mirror foil to give ordinary glass, furniture, or decor a stunning mirrored finish. You don’t need any special tools or experience — just a few simple materials and a bit of patience. By the end, you’ll have your own reflective masterpiece that looks surprisingly professional.
What Is Mirror Foil?
 |
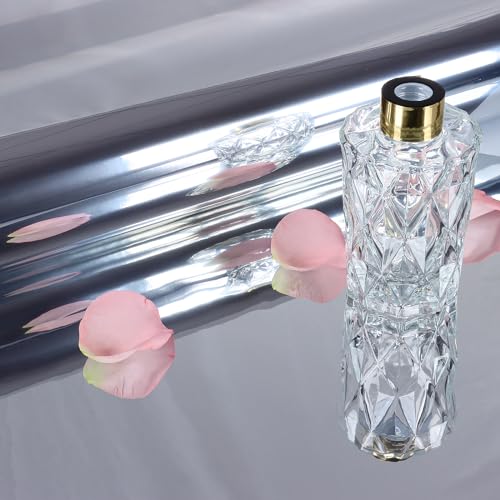
| A close look at mirror foil — flexible, self-adhesive, and easy to cut for any furniture or decor project. |
Mirror foil (also called mirror-effect film or self-adhesive mirror sticker) is a thin, flexible material that mimics the look of real glass mirrors. It usually comes with a sticky back protected by a peel-off layer, making it easy to apply to smooth surfaces such as glass, plastic, wood, or even metal.
Unlike real mirrors, mirror foil is:
-
Lightweight
-
Affordable
-
Shatterproof
-
Easy to cut and shape
-
Ideal for quick DIY makeovers
It’s a fun and creative way to add shine, reflect light, and visually open up small spaces — all while reusing and refreshing what you already have.
Why Use Mirror Foil in Home Decor?
 |
| Mirror foil gives old furniture a new, modern life. Perfect for upcycling dressers, cabinets, or closet doors without heavy renovation. |
Mirror foil is a hidden gem in the world of DIY home decor and furniture upcycling. Whether you want to modernize a tired old dresser, decorate a coffee table, or create a faux mirror wall, this material can completely change the look of your space.
Here are some reasons you’ll love working with it:
-
Instant transformation – A few minutes of work can make your furniture look brand new.
-
Budget-friendly – Costs much less than replacing furniture or buying actual mirrors.
-
Customizable – Cut it into any shape or size.
-
Creative freedom – Use it for accents, panels, art, or entire surfaces.
-
Eco-conscious – Upcycling furniture keeps it out of landfills while giving it new life.
Mirror foil is also perfect for renters, since it’s often removable and doesn’t damage the surface underneath.
What You’ll Need for This DIY
Before you start, gather a few basic tools and supplies. You probably already have most of these at home:
.png) |
| All you need for this mirror foil DIY: scissors, spray cleaner, squeegee, and a roll of mirror foil — simple, affordable tools for a beautiful result. |
-
Scissors or a utility knife – for cutting the foil to size
-
Mirror foil sheet – available online or at hardware stores
-
Window cleaning spray (or water mixed with a little dish soap)
-
Squeegee or window scraper – for smoothing the foil
-
Microfiber cloth – to clean and polish the surface afterward
Optional:
-
Ruler or measuring tape
-
Craft mat or cutting board
-
Hair dryer (to help remove small bubbles)
How to Apply Mirror Foil Step-by-Step
Applying mirror foil is easier than it looks. Just take your time, work slowly, and keep the surface clean.
Step 1: Clean the Surface
.png) |
| Start your mirror foil DIY by cleaning the glass or furniture surface thoroughly. A smooth, dust-free base helps the mirror foil stick perfectly. |
Start with a spotless surface. Spray the glass, furniture, or any smooth area with window cleaner and wipe it dry. Dust, grease, or fingerprints can prevent the foil from sticking evenly.
Tip: For wood furniture, make sure the surface is smooth — sand lightly if needed and wipe away the dust before applying.
Step 2: Cut the Foil
.png)
Measure the surface you’re covering, then cut your mirror foil slightly larger than needed. It’s always easier to trim off the excess later than to find out you cut it too small.
If you’re applying it to a piece of glass, you can place the glass directly over the foil and trace around it before cutting.
Step 3: Spray with Window Cleaner
Here’s a simple trick: lightly spray the glass or surface again with window cleaning spray before applying the foil. The moisture helps you slide and adjust the foil more easily before it fully sticks.
Step 4: Apply the Mirror Foil
Carefully peel off a few inches of the backing paper, align the edge of the foil with your surface, and gently press it down. Continue peeling and pressing a bit at a time to avoid creases or bubbles.
Step 5: Smooth It Out
.png)
Use a rubber squeegee or window scraper to push out any air bubbles or excess moisture. Start from the center and work toward the edges in smooth, firm strokes.
If you notice small air bubbles, you can gently lift that section and smooth it again. For stubborn ones, prick them lightly with a pin and smooth out the air.
Step 6: Trim the Edges
.png) |
| Measure and cut your mirror foil slightly larger than your surface — this ensures clean, even coverage when you trim the edges later. |
Once the foil is smooth and flat, use a sharp knife or craft blade to carefully trim off any extra material around the edges. Work slowly to avoid cutting into the surface below.
Step 7: Polish the Surface
.png)
After trimming, wipe the mirror foil gently with a clean, soft cloth. Step back — you’ve just created your own mirror effect!
Where You Can Use Mirror Foil
One of the best things about mirror foil is how versatile it is. You can use it almost anywhere you have a smooth, clean surface. Here are some creative ideas to inspire you:
.png) |
| Your mirror foil surface is ready! Notice how it reflects light and objects around it — an easy, budget-friendly way to brighten any space. |
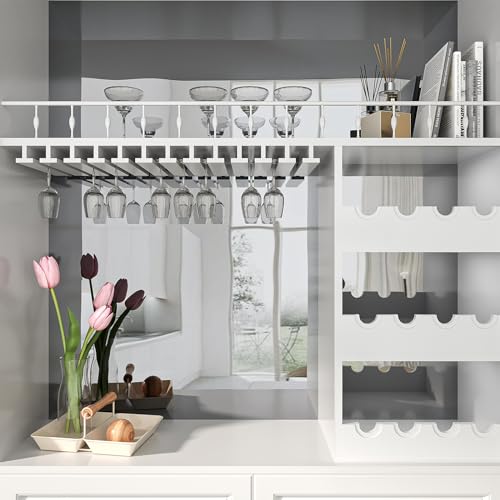
1. Upcycle Old Furniture
Turn tired furniture into statement pieces! Apply mirror foil to:

-
Drawer fronts
-
Table tops
-
Cabinet doors
-
Vanity tables
-
Closet panels
The reflective finish adds a chic, modern touch that pairs beautifully with both minimalist and vintage interiors.
2. DIY Home Decor Projects
You can also use mirror foil to make:
-
Wall art or geometric mirror shapes
-
Decorative trays
-
Candle holders or vases
-
Photo frame inserts
-
Jewelry boxes
It’s a great way to experiment without permanent commitment.
3. Create Faux Mirrors
 |
| The reflection from mirror foil is slightly softened, giving your decor a dreamy glow instead of a harsh mirror reflection. |
If you have an extra piece of glass or acrylic lying around, use mirror foil to turn it into a DIY mirror!
The reflection won’t be as sharp as a real mirror, but it gives a soft, modern look that works beautifully in decor projects.
4. Seasonal and Party Decor
Mirror foil also adds glamour to seasonal DIYs — try it for:
-
Christmas ornaments
-
New Year’s table decor
-
Wedding backdrops or props
It catches the light beautifully and photographs well, making it a favorite for event styling.
Mirror Foil vs Real Mirror: What to Expect
.png)
Mirror foil creates a reflective effect, but it’s not a perfect mirror. You’ll notice the reflection is slightly blurred, more like a soft shine than a clear reflection. However, for decor and upcycling purposes, that’s often a bonus — it adds glow and depth without being overly sharp.
Here’s a quick comparison:
| Feature | Mirror Foil | Real Mirror |
|---|---|---|
| Cost | Low | High |
| Weight | Very light | Heavy |
| Safety | Shatterproof | Fragile |
| Installation | DIY-friendly | Requires tools |
| Reflection | Slightly blurred | Crystal clear |
| Best for | Decor, crafts, furniture | Bathrooms, dressing areas |

A Simple DIY with Stunning Results with Mirror Foil

Working with mirror foil is one of those DIY projects that gives you instant gratification. With just a few simple materials, you can completely refresh your furniture, create reflective decor, or experiment with modern design ideas.
It’s easy, affordable, and fun — a perfect weekend project for anyone who loves home decor DIY and furniture upcycling. Whether you want to add light to a dark corner or give an old piece of furniture a glamorous makeover, mirror foil is the shiny little secret that can make it happen.
So grab your scissors, spray bottle, and creativity — and start transforming your space with mirror foil today!
.png)
.png)
.png)
.png)
.png)
Mirror Foil FAQ
What is mirror foil?
Mirror foil is a thin, shiny, self-adhesive film that looks like a real mirror. It’s lightweight, flexible, and perfect for DIY home decor or furniture makeovers.
Where can I use mirror foil?
You can use mirror foil on smooth surfaces such as glass, tables, cabinets, shelves, or picture frames. It instantly adds shine and a modern look to any room.
Does mirror foil stick to wood?
Yes, but make sure the wood is smooth and clean. For best results, sand lightly and remove any dust before applying the foil.
How do I apply mirror foil?
Clean the surface, spray lightly with water or window cleaner, place the mirror foil, and smooth it out using a squeegee or soft cloth. Trim the edges with a sharp knife.
Can I remove mirror foil later?
Yes! Gently heat it with a hair dryer, peel it off slowly, and clean any leftover glue with rubbing alcohol or adhesive remover.
Is mirror foil waterproof?
It’s moisture-resistant but not fully waterproof. Avoid using it in showers or areas with constant heat or steam.
How do I clean mirror foil?
Wipe it gently with a soft cloth and mild glass cleaner. Avoid scrubbing or harsh chemicals to keep the shine bright.
Join the conversation