DIY Woven Ring Tutorial Own Copper Wire Ring at Home
.png)
There’s something magical about handmade jewelry — especially when it’s made from copper. The warm, earthy glow of this metal gives every piece a timeless, artisan look. If you have a warm skin undertone, copper jewelry is your best friend — it flatters your skin, catches the light beautifully, and feels rustic yet elegant all at once.
In this woven ring tutorial, I’ll show you how to make a beautiful copper woven ring using just a few basic tools and wires. This technique is beginner-friendly and incredibly satisfying — you’ll be amazed at what you can create with your hands and a few strands of wire!
Why Copper Is Perfect for Jewelry Making
Copper has been used in jewelry for thousands of years — ancient Egyptians, Greeks, and Celts all loved it for its versatility and natural beauty. It’s soft enough to shape with simple tools, but strong enough to hold its form once you finish your piece.
Another reason to love copper? It develops a unique patina over time, giving your jewelry that antique, bohemian feel. You can always polish it back to a shiny finish if you prefer, but many people (myself included) adore that vintage glow that comes naturally with wear.
And the best part: copper is affordable and forgiving — perfect for beginners who are still experimenting with wire wrapping and jewelry making.
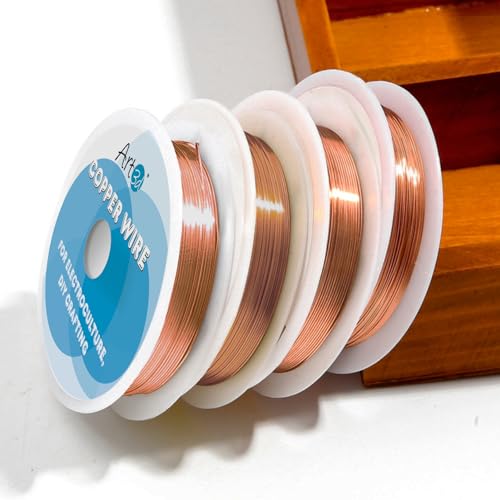
What You’ll Need
You don’t need a fancy jewelry studio to make this woven copper ring — just a few basic supplies.
.png) |
| Everything you need for this woven ring tutorial – copper wire, pliers, and a bit of creativity! |
Materials:
-
Copper wire – 2.0 mm (for the base)
-
Copper wire – 0.5 mm (for weaving)
Tools:
-
Flat-nose pliers
-
Round-nose pliers
-
Sandpaper or nail file
-
Vise (optional)
-
Adhesive tape
-
Thick marker or ring mandrel (for shaping)
If you’re just starting out, don’t stress about buying everything at once. You can find copper wire at most craft stores or online, and simple pliers from any hardware store will work just fine for your first few projects.
Step 1: Measure Your Finger
.png) |
| Before starting your DIY woven ring, measure your finger with a thin wire to get the perfect fit. |
Before we start weaving, we need to know the correct ring size. You can use a thin piece of wire or string to wrap around your finger, then mark where it overlaps. Straighten it out and measure the length — that’s your finger circumference.
Now, cut three pieces of the 2.0 mm copper wire, each long enough to match your measurement, with about 1–2 cm extra to work with. These will form the sturdy base of your woven ring.
Tip: If you plan to make multiple rings, write down your measurements for each finger. It’ll save you a ton of time later!
Step 2: Secure the Wires Together
.png)
Take your three thick copper wires and line them up neatly, side by side. You can secure them in a vise (if you have one) or simply tape the ends together with adhesive tape. The goal is to keep them still while you weave the thinner wire around them.
This part can feel a bit fiddly at first, but once you get the hang of it, it’s relaxing — almost meditative. You’ll start to see your design come alive with each wrap.
Step 3: Begin the Weave
.png)
Now comes the fun part: weaving!
Take your 0.5 mm copper wire — this is your weaving wire — and start wrapping it around the three thicker base wires. You can follow the pattern shown in photos (if you’re making this tutorial visual), or simply alternate your wraps to create a consistent, even pattern.
Think of it like braiding hair, only smoother and shinier.
Gently pull the wire tight as you go, but don’t overdo it — you want tension, not breakage. The thin copper wire is strong but can snap if pulled too hard.
Continue weaving until you reach the desired length — usually long enough to wrap comfortably around your finger, with a little extra for shaping.
Step 4: Shape the Ring
.png) |
| Shape your copper wire ring using a marker or ring mandrel for that perfect round form. |
Once you’ve woven your copper wires together, it’s time to form the ring shape.
Wrap your woven strip gently around a thick marker, lip balm tube, or ring mandrel — anything cylindrical and roughly finger-sized will work.
If your pliers don’t have a smooth coating, wrap them with a bit of fabric or leather before using them to adjust the shape. That way, you’ll avoid leaving tool marks on the shiny copper surface.
Don’t worry if the ring isn’t perfectly round yet — you can tweak it as you go. Copper is very forgiving!
Step 5: Finishing Touches
.png)
Use a nail file or fine-grit sandpaper to smooth any sharp edges or wire ends. This step makes your ring comfortable to wear and gives it a professional finish.
At this stage, you can also choose to slightly flatten the ring with your pliers or leave it as is — both styles look lovely. The woven texture adds a rustic, handmade charm no matter what.
Step 6: Optional – Polish or Patina
If you prefer a bright, shiny look, gently polish your woven ring with a soft cloth or a jewelry polishing pad. To give it a vintage feel, you can use a patina solution to darken the crevices and highlight the weave pattern.
Experiment and see what you love most — that’s the beauty of handmade jewelry. Every piece is unique.
Caring for Your Copper Jewelry
 |
| A close-up of the finished woven copper ring – elegant, handmade, and perfect for everyday wear. |
Copper naturally reacts with air and skin, so don’t be surprised if your ring darkens slightly over time — it’s part of its charm! If you prefer to keep it shiny, store it in a small airtight bag when not in use, and give it a quick polish with a soft cloth before wearing.
A fun trick: you can also coat the inside of the ring with a thin layer of clear nail polish to prevent the metal from reacting with your skin.
How It Looks When It’s Done
.png)
When you finish, you’ll have a gorgeous woven copper ring that looks elegant, earthy, and completely handmade. You can wear it on its own for a minimalist vibe or stack it with other copper or silver rings for a boho layered look.
Every time you glance down at your hand, you’ll feel that quiet pride of having created something beautiful from scratch — using nothing but simple wire, patience, and creativity.
(And yes, once you make one, you’ll definitely want to make more!)
Fun Add-On Ideas
.png) |
| A set of handmade woven copper rings – ideal for stacking or gifting to someone special. |
Once you master the basic woven ring, the possibilities are endless:
-
Add a gemstone or bead in the center for a statement look.
-
Use silver or brass wire for different color combinations.
-
Mix wire thicknesses to create intricate textures.
-
Oxidize the copper for an antique effect.
-
Try multi-band designs for stacking rings.
Experimenting is part of the joy of wire wrapping — every new variation feels like discovering a new art form.
Quick Safety Tip
When your ring is finished, try to keep it away from household chemicals like bleach, perfumes, or cleaning sprays — they can dull the beautiful copper shine over time. Store your ring in a dry place when you’re not wearing it, and give it a quick polish once in a while to keep that lovely glow.
And a little word of warning: once you start wearing your new woven copper ring, people will notice. Friends might “borrow” it and forget to return it — it’s that eye-catching!
DIY Woven Ring - Best Jewelry
Making a woven ring is one of the most rewarding small jewelry projects you can try. It’s simple enough for beginners yet offers endless creative potential as you get more confident. Plus, copper is such a warm, expressive material that even the simplest designs look beautiful.
So grab some wire, your favorite playlist, and a cozy afternoon — and let your hands create something truly special.
Because at the end of the day, handmade jewelry isn’t just about wearing art.
It’s about feeling connected to the process, the material, and yourself.
This post has affiliate links * Affiliate Link. This means that if you click on the link and purchase an item, I will receive a small percentage of your purchase (at no extra cost to you)
.png)
.png)
.png)
.png)
.png)
Woven Ring – FAQ
What wire sizes work best for a woven ring?
How do I measure my finger for a perfect fit?
How do I keep the weave even and tight?
How can I shape the ring without tool marks?
How do I finish and smooth sharp ends?
Will copper tarnish and how do I clean it?
Any tips for sensitive skin or color transfer?
How do I add style—patina or shine?
Ready to try? Follow my step-by-step woven ring tutorial to measure, weave, shape, and finish a beautiful copper wire ring at home.
Join the conversation