Learn How to Create a Gianni-Inspired Puff Sleeve Blouse from Scratch

February 11, 2024

Learn How to Create a Gianni-Inspired Puff Sleeve Blouse from Scratch


Do you love sewing and fashion? Do you want to learn how to create your own stunning puff sleeve blouse? If you answered yes, then you’re in for a treat!

In this blog post, I’m going to share with you a video tutorial that I made on how to draft a puff sleeve blouse inspired by Gianni. 


This blouse is a classic and timeless piece that you can wear for any occasion. It has a flattering fit, and of course, the iconic puff sleeves that make a statement.

The best part is, you don’t need to buy a pattern or spend a lot of money to make this blouse. You can draft it yourself using some basic measurements and tools. And I’m going to show you how to do it step by step in this tutorial.


Tools and Materials for Pattern Drafting

Pattern drafting allows you to customize the fit and style of your clothing, and express your creativity and personality. To draft your own patterns, you will need some essential tools and materials that will make your work easier and more accurate. Here are the tools and materials you need for pattern drafting:

pattern drafting tools
  • A large flat surface for working: You will need a spacious and smooth surface to lay out your pattern paper and draw your pattern pieces. You can use a table, a desk, a floor, or a cutting mat.
  • A large piece of paper, such as tracing paper, to draw your pattern on.
  • Drafting paper
  • A pencil, preferably with a fine point and a good eraser, to sketch and adjust your pattern lines.
  • Notebook
  • A French curve ruler. Grab my french curved rulers for free here.
  • L ruler
  • A measuring tape, to take your body measurements and check the length and width of your pattern pieces.
  • A pair of scissors, to cut out your pattern pieces and your fabric. Check out my detailed post and learn what scissors are the best for your project.
  • Tracing wheel: You will need a tracing wheel to transfer your pattern markings to another paper or to the fabric. A tracing wheel is a tool that has a serrated or smooth wheel at the end of a handle. You can use it to trace the outline or the details of your pattern piece, such as darts, pleats, or notches. There are two types of tracing wheels: pointed and blunted. A pointed wheel is used to transfer pattern shapes to the paper, while a blunted wheel is used with carbon paper to transfer pattern shapes to the fabric.

Pattern Hacking

Whether you are a beginner or an advanced sewer, you will learn a lot of tips and tricks from this video. You will learn how to make your blouse more fitted or boxy, how to add bust darts in two different ways, how to make a princess seam top, and how to do pleats at the waist or change the shape of the hem.

You will also learn how to choose the right fabric, how to cut and sew the pieces, and how to finish the edges . By the end of this video, you will have a beautiful puff sleeve blouse that you can proudly wear and show off.


So, what are you waiting for? Click the link below and watch the video now. And don’t forget to leave a comment and let me know what you think of this project. I would love to hear from you and see your creations.

Step by Step Puff Sleeve Blouse Drafting Video Tutorial

Step by step video here

Thank you for reading and happy sewing!


 This post has affiliate links * Affiliate Link. This means that if you click on the link and purchase an item, I will receive a small percentage of your purchase (at no extra cost to you).

How a Magnetic Seam Guide Can Improve Your Sewing Skills and Projects

February 07, 2024

How a Magnetic Seam Guide Can Improve Your Sewing Skills and Projects


If you are new to sewing or want to improve your sewing skills, one of the tools that can help you is a magnetic seam guide. A magnetic seam guide is a small metal device that attaches to the metal throat plate of your sewing machine and helps you sew straight and even seams. In this post, I will explain what a magnetic seam guide is, how to use it, and what are the benefits and drawbacks of using it.


What is a Magnetic Seam Guide?


A magnetic seam guide is a metal ruler or bar that has a strong magnet on the back. It sticks to the metal throat plate of your sewing machine and acts as a guide for your fabric. You can adjust the position of the magnetic seam guide to any width you want, depending on the seam allowance you need. The magnetic seam guide helps you keep the fabric aligned with the edge of the guide, so you can sew straight and consistent seams.

How to Use a Magnetic Seam Guide?


Using a magnetic seam guide is very easy and simple. Here are the steps to use a magnetic seam guide for sewing:

1. Place the magnetic seam guide on the metal throat plate of your sewing machine, as far from the needle as you want your seam allowance to be. For example, if you want a 1/4 inch seam allowance, place the magnetic seam guide 1/4 inch away from the needle.
2. Align the edge of your fabric with the edge of the magnetic seam guide, and pin or clip it in place if needed.
3. Sew along the edge of the fabric, keeping it aligned with the edge of the magnetic seam guide. The magnetic seam guide will help you sew straight and even seams, without having to mark the fabric or use a tape measure.
4. Repeat the process for the other seams you need to sew.

What are the Benefits and Drawbacks of Using a Magnetic Seam Guide?


Using a magnetic seam guide has some benefits and drawbacks, depending on your sewing project and preference. Here are some of the pros and cons of using a magnetic seam guide:

- Benefits:


    - It is easy to use and adjust. You can simply place it on the metal throat plate and move it to any position you want.
    - It is inexpensive and widely available. You can find it at most craft stores or online for a few dollars.
    - It is durable and reusable. You can use it for many sewing projects and it will not wear out or lose its magnetism.
    - It is versatile and flexible. You can use it for any type of fabric and any width of seam allowance. You can also use it for other sewing techniques, such as hemming, quilting, or piping.

- Drawbacks:


    - It may not work well with some fabrics or sewing machines. Some fabrics may be too thick, slippery, or stretchy to be guided by the magnetic seam guide. Some sewing machines may have a plastic or non-metallic throat plate that the magnetic seam guide cannot stick to.
    - It may interfere with the sewing machine's functions or settings. Some sewing machines may have sensors, buttons, or dials that the magnetic seam guide may block or affect. Some sewing machines may also have a computerized system that the magnetic seam guide may damage or disrupt.
    - It may move or fall off during sewing. The magnetic seam guide may not be strong enough to stay in place, especially if you sew fast or with a lot of pressure. The magnetic seam guide may also be knocked off by your hands or the fabric.


Last Thoughts

A magnetic seam guide is a handy tool that can help you sew straight and even seams. It is easy to use, inexpensive, durable, and versatile. However, it may not work well with some fabrics or sewing machines, and it may interfere with the sewing machine's functions or settings. It may also move or fall off during sewing. Therefore, you should always test the magnetic seam guide before using it, and be careful not to damage or disrupt your sewing machine. I hope you found this post helpful and informative. If you have any questions or feedback, please leave a comment below. Happy sewing! 😊


 Pins:


How to Sew a Double Slit Mini Skirt (With Free PDF Pattern)

February 04, 2024

How to Sew a Double Slit Mini Skirt (With Free PDF Pattern)


Do you love sewing and making your own clothes? If so, you’re going to love this tutorial. In this post, I’m going to show you how to sew a double slit mini skirt from scratch. This is a very easy and fun project that you can do in your spare time. And the best part is, you don’t need to buy a pattern, because I’m going to give you one for free. You just need to adjust it a little bit to create the double slit effect. This skirt is perfect for any season and any occasion. You can dress it up or down, depending on your mood.


What You’ll Need

To make this skirt, you’ll need the following materials and tools:


  • Fabric of your choice (I used a unstretchy cotton, but you can use any fabric that has some stretch to it)
  • Sewing machine
  • Scissors
  • Pins
  • Measuring tape
  • Iron
  • Free PDF pattern (download it from the link below)


Waist Darts

Learn more and see my detailed step by step post on this fantastic sewing hack and watch the video here.

Waist darts

How to Add a Slit

Watch my detailed video on how to add a slit to any skirt or dress.


How to Sew a Double Slit Mini Skirt

Step 1: Download and print the free PDF pattern from the link below. . Make sure you print it at 100% scale and check the test square to ensure the correct size. The pattern has two pieces: the front and the back. Cut out the pieces and tape them together along the dashed lines.

Step 2: Fold your fabric in half, right sides together, and place the pattern on top of it. Pin the pattern to the fabric and cut around it, leaving a 1/4 inch seam allowance. You should have two identical pieces of fabric.

Step 3: Mark the slit lines on the front and back pieces. The slit lines are indicated by the solid lines on the pattern. You can use a fabric marker, chalk, or pins to mark them.

Step 4: Sew along the slit lines, starting from the bottom edge and stopping about 2 inches from the top edge. Backstitch at the beginning and end of each seam. Cut the seam allowance along the slit lines, being careful not to cut the stitches.

Step 7: Now, you need to sew the waistband to the skirt. To do this, place the waistband pieces right sides together, matching the short edges. Pin and sew along the short edges, using a 5/8 inch seam allowance. Press the seam allowances open. Fold the waistband in half, wrong sides together, and press it. Then, unfold the waistband and pin it to the top edge of the skirt, right sides together, matching the side seams and the notches. Sew along the top edge, using a 5/8 inch seam allowance. Press the seam allowances up and the waistband down.

How to Style a Double Slit Mini Skirt

Now that you have your double slit mini skirt, you can style it in many different ways. Here are some ideas to inspire you:


Here are some tips and examples for styling a double slit mini skirt,:
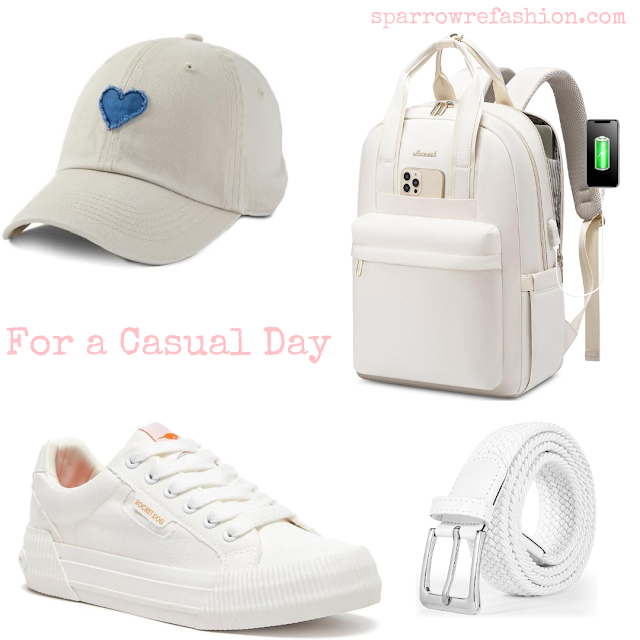
For a casual and sporty look
Style proposition for double slit mini skirt.

Pair it with a T-shirt, a denim jacket, and sneakers. You can also add some accessories like a cap, a backpack, or a belt.


For a semi-formal and chic look
Style proposition for double slit mini skirt.

You can pair your skirt with a blouse, a blazer, and mules. You can also add some accessories like a necklace, a clutch, or a scarf.

For a party and sexy look
Style proposition for double slit mini skirt.

Think to pair with a crop top, a leather jacket, and heels. You can also add some accessories like earrings, a crossbody bag, or a choker.


For a brunch and girly look
Style proposition for double slit mini skirt.

Pair your double slit mini skirt with a sweater, a trench coat, and flats. You can also add some accessories like a hat, a tote bag, or a bracelet.

For a coffee date and cozy look
Style proposition for double slit mini skirt.

Your skirt will look great with a cardigan, a turtleneck, and boots. You can also add some accessories like a beret, a satchel, or a ring.

Watch the Video Tutorial

If you want to see how I made this skirt in more detail, you can watch the video tutorial on my YouTube channel. In the video, I’ll show you how to sew a double slit mini skirt step by step, and I’ll also give you some tips and tricks along the way.  

You can watch the video here.


Don’t forget to like, comment, and subscribe to my channel for more sewing tutorials. And if you make this skirt, please share it with me on Instagram or Facebook. I would love to see your creations.

Download the Free PDF Pattern

To download the free PDF pattern for this skirt, just click the link below.

Download the free PDF pattern here.

I hope you enjoyed this tutorial and learned how to sew a double slit mini skirt. This skirt is one of my favorite DIY projects ever, and I’m sure you’ll love it too. Happy sewing! 😍

 This post has affiliate links * Affiliate Link. This means that if you click on the link and purchase an item, I will receive a small percentage of your purchase (at no extra cost to you).

 How to Sew More Accurately [Sewing Tips and Tricks]

February 02, 2024

How to Sew More Accurately [Sewing Tips and Tricks]


Sewing is a wonderful hobby that can be both relaxing and rewarding. However, it can be frustrating when your sewing projects don’t turn out as well as you’d hoped. Fortunately, there are many tips and tricks you can use to sew more accurately and make your projects look more professional.


Sewing is a craft that has been around for centuries. It is a skill that can be learned by anyone, and with practice, you can create beautiful garments and accessories. In this blog post, we will discuss some tips and tricks that will help you sew more accurately and make your projects look more professional.


''Must have'' Sewing Tools

Having the right tools is essential for sewing. Here are some tools that you should have in your sewing kit:

  • Scissors: A good pair of scissors is essential for cutting fabric. Make sure to keep them sharp and use them only for fabric.

Check out my detailed post on scissors and learn what scissors use to what project.
 

  • Seam ripper: A seam ripper is a small tool that is used to remove stitches. It is helpful when you need to redo a seam.

Check out my detailed post on this amazing tool.


  • Measuring tape: A measuring tape is used to take measurements. Make sure to get a flexible measuring tape that can wrap around curves.

Learn how to measure yourself for sewing and drafting patterns.
 

  • Rotary cutter: A rotary cutter is a tool that is used to cut fabric. It is faster and more accurate than scissors.


  • Sewing machine: A sewing machine is not essential, but it can make your sewing projects faster and more efficient. Make sure to get a machine that has features like automatic needle threading and a speed control slider to make your sewing experience smoother.

Learn more on sewing machines and choose the best for yourself.

Sewing Tips and Tricks for More Precision

Here are some tips and tricks that will help you sew more accurately:

  • Take your time: Sewing requires patience and attention to detail. Take your time when cutting your fabric and sewing your seams to ensure accuracy. Rushing through your project can lead to mistakes and frustration.
  • Press your seams: Pressing your seams is an important step in sewing that can make a big difference in the final result. Use an iron to press your seams flat and open to create a professional-looking finish.


  • Use a seam guide: A seam guide is a tool that helps you sew straight seams. You can use a stack of post-it notes or a magnetic seam guide to keep your seams straight and accurate.


  • Practice, practice, practice: The more you sew, the better you’ll get. Don’t be afraid to try new techniques and experiment with different fabrics. With practice, you’ll become more confident in your sewing skills and be able to tackle more complex projects.


Helpful Tools

Here are some helpful tools that you can use to make your sewing projects easier:

  • Fabric glue: Fabric glue is a great alternative to sewing. It can be used to hem pants, fix seams, and attach patches.


  • Sewing clips: Sewing clips are a great alternative to pins. They are easier to use and won’t damage your fabric.


  • Marking tools: Marking tools are used to mark your fabric. You can use chalk, a water-soluble pen, or a disappearing ink pen to mark your fabric.


Sewing is an awesome and rewarding hobby that can be enjoyed by anyone. With the right tools, tips, and tricks, you can sew more accurately and make your projects look more professional. Remember to take your time, practice, and have fun!

 This post has affiliate links * Affiliate Link. This means that if you click on the link and purchase an item, I will receive a small percentage of your purchase (at no extra cost to you).